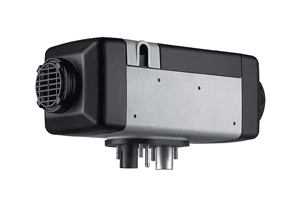
Your Webasto Air Top 2000 Campervan Heating Guide

When you’re exploring the UK’s stunning and often chilly landscapes, a reliable campervan heater isn’t a luxury—it’s an absolute necessity. For thousands of van owners, the Webasto Air Top 2000 has become the go-to solution. Think of it as a compact and seriously efficient central heating system for your home on wheels, sipping fuel directly from your van’s diesel tank to deliver consistent, dry warmth. It’s a genuine game-changer for year-round adventures.


For quotes and bookings, call or email us here.


Why This Heater Is a UK Campervan Favourite

Anyone who has tried to predict British weather knows you need a heating source you can count on. The Webasto Air Top 2000 STC consistently rises to the challenge. For campervan folks everywhere, from the Scottish Highlands down to the Cornish coast, this little unit represents freedom—the freedom to travel comfortably, whatever the season. It’s what turns a cold van into a warm, inviting home base after a long day of hiking or exploring.

This popularity isn’t some happy accident. It’s built on a rock-solid reputation for robust German engineering, remarkably quiet operation, and a design that saves precious space. In any van conversion, every centimetre counts. The heater’s tiny footprint means it can be tucked away neatly under a seat or in a small cupboard, leaving you with more room to live.

The Power of Compact Design

Since it first hit the UK market, the Webasto Air Top 2000 STC has cemented its place as the top choice for an auxiliary diesel heater. A huge part of its appeal is its size—it’s one of the smallest air heaters out there—and a modest yet powerful heat output of 2 kW. Despite its small stature, it efficiently heats spaces up to 15–20 square metres, making it a favourite among UK van lifers who need every bit of space they can get.

The real value of the Air Top 2000 isn’t just the warmth it produces, but the extended travel season it unlocks. It turns the ‘off-season’ into the ‘adventure season’ for countless UK campervan owners.

Its key benefits are straightforward and compelling:

  • Direct Fuel Integration: It conveniently sips diesel directly from your main vehicle tank, so there’s no messing about with separate fuel canisters.
  • Low Power Consumption: The unit is designed to be incredibly efficient, drawing minimal power from your leisure battery—absolutely crucial for off-grid camping.
  • Dry Heat Production: Unlike some gas heaters that can create condensation issues, this diesel heater provides a dry warmth that helps keep moisture and dampness at bay inside the van.

This blend of reliability, efficiency, and smart design makes the heater more than just a piece of kit. It’s an essential upgrade for comfortable, four-season van adventures. For those with an interest in the UK, especially when considering moving or extended stays, you might also find this guide on UK customs useful.

How a Diesel Heater Actually Warms Your Van

Let’s take a closer look at how a Webasto Air Top 2000 functions. Picture it as a compact jet engine, expertly crafted and secured to generate nothing but pure, dry heat for your van.

At its core, the process is all about controlled combustion and efficient heat exchange. The real genius, though, is how the unit keeps the fiery part of the process completely sealed off from the air you’re breathing. Getting your head around this separation is the key to understanding why these heaters are so safe and reliable.

The whole operation is a closed loop. It pulls in air and fuel from outside, does its magic, and then vents all the nasty stuff back outside. The only thing that ever makes it into your living space is pure, cosy warmth.

The Journey of Combustion, Step by Step

It all starts when you flick a switch or tap your controller. That simple action kicks off a precise, automated sequence designed for maximum safety and efficiency. Here’s a breakdown of what happens next.

  1. Fuel on Demand: You’ll hear a gentle, rhythmic ticking. That’s the dedicated metering fuel pump doing its job. This isn’t just any pump; it’s designed to sip, not guzzle, drawing a tiny, perfectly measured amount of diesel from your van’s main tank and sending it along to the heater.
  2. A Breath of Fresh Air: At the same time, a combustion fan inside the unit pulls in air. This air is only for burning the fuel – it never mixes with the air inside your camper.
  3. The Spark of Life: Inside a sealed combustion chamber, a glow pin then heats up to an incredibly high temperature, acting like a super-hot spark plug to ignite the fuel. This creates a tiny, stable, and very hot flame.

The heater’s brain, its electronic control unit (ECU), watches this startup process. If a stable flame isn’t achieved quickly, it shuts the whole thing down and tries again. It’s a critical built-in safety feature.

Getting the Heat Without the Fumes

With a stable flame established, the real work begins. The hot gases from the tiny fire are funnelled through a heat exchanger. You can think of it as a radiator, but instead of heating water, it’s heating air.

Then a separate, much larger fan pulls in cool air from inside your campervan and blows it over the outside fins of the hot heat exchanger.

The heat exchanger is the most important part of the entire design. It’s the impenetrable wall that allows heat to transfer through its metal casing while physically stopping any toxic exhaust fumes from ever mixing with the clean air destined for your living area.

The transfer is incredibly efficient. The metal fins soak up the intense heat from the flame and instantly pass it on to the clean cabin air flowing over them. This newly heated air is then pushed through ducting, emerging into your van as that lovely, dry warmth you’re after.

Finally, the exhaust gases are channelled out of the heat exchanger and safely vented away through an exhaust pipe under the van. At no point do they ever enter your living space. This complete separation of the two air circuits is the fundamental safety principle that makes the Webasto Air Top 2000 such a trusted piece of kit for campervans everywhere.

Choosing the Right Webasto Air Top 2000 Controller for Your Travel Style

The Webasto Air Top 2000 STC is a brilliant piece of kit, but the controller is how you interact with it. This is your command centre for comfort, and picking the right one transforms the heater from a simple box into a core part of your campervan experience. Each option is designed for a different kind of traveller and a different budget.

Understanding the differences is crucial. Do you just need to crank up the heat when you feel a chill, or do you want to wake up to a pre-warmed van on a frosty morning? Maybe you dream of firing up the heater from a ski lift, ensuring your van is toasty the second you get back. Let’s break down the main choices to find your perfect match.

The Simple Turn-and-Go Rotary Rheostat

For the no-fuss traveller, the Rotary Rheostat is simplicity itself. It’s a classic dial that you turn to set your desired heat level—that’s it. There are no screens, no menus, and no programming to fiddle with. Think of it as the volume knob for your warmth.

Room Thermostat For Webasto Air Top 2000

This controller is perfect for those who value straightforward, reliable operation above all else. When you feel cold, you turn it up. When you’re warm enough, you turn it down. It’s dependable, intuitive, and gets the job done without any faff, making it a popular choice for minimalist builds or for people who just prefer good old-fashioned analogue controls.

The Programmable MultiControl HD

The MultiControl HD is a serious step up, bringing modern convenience and precise control into the mix. This digital unit has an easy-to-read screen and a multi-function dial, allowing you to set the exact temperature you want, right down to the degree.

Webasto MultiControl

Its real trump card, though, is the programmable timer. You can set up to three different heating schedules per day, for every day of the week. This is a game-changer for the adventurer who thrives on routine. Imagine setting it to kick in at 7 AM so you always wake up to a warm van, and another cycle to start just before you typically get back from a day’s hiking. You can find out more about what a programmable controller like the Webasto MultiControl can do for you.

The ability to pre-program your heating isn’t just about comfort; it’s about being smart with your resources. The MultiControl HD makes sure the heater only runs when you need it, helping you manage both your fuel and battery consumption intelligently.

The Premium Smartphone-Controlled ThermoConnect

For the ultimate in remote convenience, the ThermoConnect brings your Webasto Air Top 2000 into the smart age. This premium option lets you control your heater from anywhere you have a mobile phone signal, all through a dedicated app.

Smartphone-Controlled ThermoConnect For Webasto Air Top 2000

Walking back to your campervan after a long, cold day on the trails? Just pull out your phone, open the app, and switch the heater on. By the time you arrive, your van will be a warm and welcoming haven. The ThermoConnect offers all the functionality of the MultiControl—like precise temperature settings and timers—but adds that incredible layer of complete remote access. It’s the peak of convenience for the tech-savvy van owner who wants total control, anytime, anywhere.

Webasto Air Top 2000 STC Control Unit Comparison

To help you visualise the differences and decide which controller is right for your adventures, here’s a quick comparison of what each one offers.

FeatureRotary RheostatMultiControl HDThermoConnect
Control MethodManual DialDigital Screen & DialSmartphone App
Temperature SettingPrecise (in degrees)VariableVariable
Programmable TimerNoYes (7-day timer)Yes (via app)
Remote AccessNoNoYes (Global)
Ideal ForSimplicityRoutine & EfficiencyUltimate Convenience

Ultimately, your choice of controller comes down to how you actually use your campervan. The simple Rotary Rheostat offers rugged reliability, the MultiControl HD provides scheduled comfort, and the ThermoConnect delivers unparalleled remote control. Each one gives you the power to effectively manage the 2kW heat output of your Webasto Air Top 2000, ensuring your travels are comfortable, whatever your style.

Your Practical Guide to a Safe Installation

Fitting a Webasto Air Top 2000 is a fantastic upgrade for any campervan. For a competent DIYer, it’s a totally achievable project. I like to think of it not just as fitting a heater, but as integrating the new heart of your van. This guide will walk you through the key stages, helping you turn that box of parts into a safe, reliable source of warmth for all your adventures.

Of course, a professional installation is always a brilliant option. But even if you go that route, understanding the process is incredibly valuable. It means you can ask the right questions and feel confident the job’s been done to the highest safety standards. We’ll cover the critical steps, from picking the perfect spot to routing the ducting for the cosiest results.

Safe Webasto Van Heater Installation

Selecting the Best Location for your Webasto Air Top 2000

Where you place your heater is the first, and arguably most important, decision you’ll make. It affects everything from how well it heats your van to how noisy it is and how easy it is to service later on. The go-to spot for most people is under one of the front seats, usually the passenger’s.

This location is popular for good reason: it’s tucked out of the way, it’s close to the vehicle’s battery, and it gives you a straight shot for dropping the exhaust and intake pipes through the van floor. That said, other spots like inside a kitchen unit or a purpose-built cupboard can also work. The key is to make sure there’s enough airflow around the unit and a clear path to the underside of the van.

  • Proximity to Fuel and Power: Try to keep the heater reasonably close to your leisure battery. This minimises voltage drop in the power cables, which is crucial for reliable startups.
  • Clearance is Key: You absolutely must leave enough space around the heater for air to circulate freely. Overheating is a major safety risk, so never box it in tightly.
  • Floor Access: The spot you choose must let you drill holes through the floor for the fuel line, combustion air intake, and exhaust pipe without hitting any chassis members, brake lines, or other vital components. Always check underneath first!

Managing Fuel and Power Safely

Connecting the fuel supply is a job that demands care and precision. Most Webasto Air Top 2000 kits come with their own fuel standpipe, which is designed to be installed directly into your campervan’s main diesel tank. This usually means dropping the tank, drilling a hole, and fitting the standpipe securely – it’s a job that requires a bit of confidence.

Tapping into the vehicle’s own fuel return line is sometimes an alternative, but this has become trickier on modern vans. Whichever route you take, making sure every connection is 100% leak-proof is completely non-negotiable.

The fuel pump for the Webasto heater is what’s known as a metering pump. You’ll hear it clicking as it delivers tiny, precise pulses of diesel. It’s vital to mount it at a specific angle (usually between 15 and 35 degrees) to stop air bubbles from getting trapped, which can cause the heater to cut out.

The electrical side of things is a bit more straightforward. The heater connects directly to your leisure battery, not the starter battery. This prevents any chance of it draining the power you need to start your engine. The dedicated fuse included in the kit is a critical safety feature and must be installed on the positive line.

Ducting and Vents for Efficient Warmth

How you route the hot air is what turns a working heater into a genuinely effective heating system. The aim is simple: get an even spread of heat throughout your living space.

  • Keep it Short and Sweet: The longer your ducting, the more heat you lose along the way. Make the path from the heater outlet to the air vent as direct and short as you can.
  • Avoid Sharp Bends: Every sharp turn in the ducting restricts airflow and reduces efficiency. Go for smooth, sweeping bends wherever possible.
  • Strategic Vent Placement: Position your main air outlet low down and in a central spot. Because hot air rises, putting the vent near the floor helps create a natural convection current that warms the whole van far more effectively. Our guide on choosing the right diesel heater for your campervan has more great tips for optimising your setup.

The Critical Under-Van Installation

What happens underneath your van is just as important as what’s going on inside. This is where you’ll fit the combustion air intake and, crucially, the exhaust pipe. Routing these two pipes correctly is all about safety and reliability.

  1. Combustion Air Intake: This flexible pipe pulls in the fresh air needed for the heater to burn fuel. You’ll want to point it towards the rear of the vehicle to stop road spray and muck from being forced into it while you’re driving.
  2. Exhaust Pipe: This stainless steel pipe gets incredibly hot. It must be securely clipped well away from any plastic parts, fuel lines, or wiring loom under the van. It’s also vital to position its outlet so that fumes can’t possibly find their way back inside the van – especially near doors, windows, or other vents.

Getting these steps right ensures your Webasto Air Top 2000 is not just effective, but above all, completely safe. A methodical approach and a refusal to cut corners are the real keys to a successful DIY installation that will give you years of reliable warmth on your travels.

Getting the Most Out of Your Webasto Air Top 2000 Heater

To really get the best from your Webasto Air Top 2000, it’s about more than just flipping a switch when you feel a chill. A few simple habits will not only keep your campervan toasty but will also go a long way in saving fuel, easing the load on your battery, and seriously extending the life of your heater. It’s all about working with the heater, not just demanding heat from it.

Think of the heater’s start-up and shutdown cycles like an athlete’s warm-up and cool-down. It just performs better when it’s properly prepared. This means that whenever you fire the heater up or turn it off, the best practice is to let it run on its highest heat setting for a few minutes.

Why? This initial blast of high heat gets the combustion chamber scorching hot almost immediately, which is exactly what you want for a clean, efficient burn right from the start. Likewise, running it on high before shutting it down helps to burn off any lingering unburnt fuel or sooty deposits that might otherwise build up.

The Soot-Busting Start-Up and Shutdown Routine

Carbon build-up, often called ‘coking’ or ‘sooting up’, is the arch-enemy of any diesel heater. It tends to happen when the heater is frequently run on a very low setting, where the combustion chamber just doesn’t get hot enough to burn the diesel fuel completely. This leaves behind a sticky, black residue that can eventually clog up the works.

A simple routine can pretty much eliminate this problem:

  1. Start-Up: Switch the heater on and crank it straight up to its maximum temperature. Let it run at full tilt for at least 5-10 minutes.
  2. Normal Operation: Once the van feels warm, you can dial the thermostat back down to whatever temperature feels comfortable. The heater will then intelligently adjust its output to hold that temperature.
  3. Shutdown: Before you turn the heater off for the night, turn it back up to maximum heat for another 5-10 minutes. This ‘purge cycle’ gives the chamber a good clean-out before it cools down.

Adopting this simple “hot start, hot stop” habit is the single most effective bit of preventative maintenance you can do. It keeps the heater’s internals clean, ensuring it starts reliably and runs efficiently for years to come.

How the Thermostat Saves You Fuel

Once your campervan reaches the temperature you’ve set on the controller, the Webasto Air Top 2000 doesn’t just abruptly switch off. Instead, it cleverly modulates its heat output, dropping down to a lower power setting to simply maintain the warmth. It starts sipping fuel instead of guzzling it, giving you a steady, consistent level of comfort.

This efficiency is a massive plus, especially in the UK where fuel costs are always a factor on any trip. The heater’s diesel consumption is impressively low—typically between 0.16 to 0.23 litres per hour at full power. Over a classic British winter weekend, running the heater for a few hours each evening might only use a couple of litres of diesel, a tiny amount from your main tank. You can read more about why this low consumption makes it such an economical choice for campervan owners.

This smart operation means you can enjoy a cosy van for an entire off-grid weekend without ever worrying about your diesel or battery levels. By mastering these simple tricks, you ensure your Webasto Air Top 2000 remains a reliable, efficient, and cost-effective companion on all your UK adventures.

Simple Maintenance and Easy Troubleshooting with Webasto Air Top 2000

A well-maintained Webasto Air Top 2000 is a wonderfully reliable bit of kit, quietly doing its job in the background of your adventures. You don’t need to be a seasoned mechanic to keep it in top shape; a few simple, regular checks will see it running flawlessly for years. Think of it as a small MOT for your heater.

Getting into these good habits is far better than trying to fix a problem on a cold, wet evening. Simple things like having a quick look at the fuel lines for any wear and tear, or making sure the intake and exhaust ports are clear of mud and debris, can make a massive difference.

A Straightforward Maintenance Schedule

Regular attention is the secret to a long and happy life for your heater. We hear it all the time from installers and van life communities across the UK: the Webasto Air Top 2000 STC is a durable, low-maintenance unit. But like any combustion heater, it needs a little TLC to stop things like carbon build-up. Follow a decent maintenance schedule, and you’ll likely get 3–5 years of trouble-free use before it needs a major service. You can learn more about what makes these units so reliable from user experiences right here.

Here’s a simple checklist to keep you on track:

  • Monthly (when in use): Give the heater a good blast on full power for at least 15-20 minutes. This high-temperature run acts like a self-cleaning cycle, burning off any carbon deposits that have built up inside the combustion chamber.
  • Every Few Months: Pop your head under the van and visually inspect the exhaust pipe. Check it’s securely fixed, has no holes, and is well clear of anything that could catch fire. This is a critical safety check you should never skip.
  • Annually: Give all the electrical connections a once-over to make sure they’re tight and free of corrosion. If you have an external fuel filter fitted, now’s the time to inspect it and either clean it or swap it out.

Solving Common Heater Problems

Even the most reliable kit can have an off day. The good news is that many common issues with the Webasto Air Top 2000 have simple fixes you can sort out yourself.

Heater Won’t Start (No Sound)

Nine times out of ten, this is a simple power issue. Before you panic, find the fuse for the heater in your van’s electrical system and check it hasn’t blown. It’s also worth grabbing a multimeter to check the voltage at your leisure battery; if it’s dropped below 11.5V, the heater’s built-in safety system might be preventing it from starting to protect the battery from going flat.

Smoky or Smelly Start-Up

A bit of white smoke when you first fire it up can be perfectly normal—it’s often just the heater burning off condensation. But if you’re getting persistent white or black smoke, it’s a classic sign of carbon build-up. This usually happens from running the heater on a low setting for long periods. The fix? That “hot burn” maintenance routine we just talked about. Run it on high to clear it out.

A critical part of maintenance is making sure the exhaust system is perfectly sealed and routed well away from any windows or vents. For total peace of mind, it is crucial to understand how to prevent carbon monoxide poisoning in your campervan.

This practical advice should give you the confidence to solve minor problems yourself, letting you enjoy your travels and know when it might be time to call in a professional.

Your Questions Answered

Got a few questions about the Webasto Air Top 2000? You’re not alone. Let’s run through some of the most common queries we get from new owners. Getting these details sorted will help you feel completely confident with your new heater.

How Much Fuel Does It Actually Use?

This is usually the first thing people ask, and the good news is, it’s surprisingly efficient. When you first fire it up and it’s working hard to get your van to temperature, it will use about 0.24 litres of diesel per hour.

But here’s the clever bit. Once it hits your target temperature, it automatically dials back. From then on, it just sips fuel, often using as little as 0.12 litres per hour just to keep things toasty.

Can I Run the Heater While I Am Driving?

Absolutely. The heater is designed to run safely while your campervan is on the move. It’s a brilliant feature, really – you can keep the living space warm during a long drive, so it’s perfectly cosy the moment you pull up and park.

Is a Diesel Heater Safe to Use in a Campervan?

Yes, it’s incredibly safe, provided it’s installed correctly. The key thing to understand is that the entire combustion process is completely sealed off from the inside of your van.

All the exhaust fumes are channelled directly outside and vented underneath your vehicle. This ensures the air inside your living space stays clean, dry, and warm. For answers to other general automotive FAQs, this is a pretty useful resource.

Our Services

Ready to bring that reliable, year-round warmth to your campervan adventures? Marine Heating Solutions offers expert advice and professional installation for the Webasto Air Top 2000 and many other heating systems. Ensure your travels are always comfortable by exploring our solutions today!


For quotes and bookings, call or email us here.


author avatar
MarineHeating Lead Heating Engineer